Airpods Max 1 & 2
 A30
A30 A40 TR
 A50 Gen 4, 5, A50X
 Maxwell
 Maxwell 2
 Penrose & Mobius
 M Series
 Beats Studio
 Beats Studio Pro
 Beats Solo 2 & 3
 Beats Solo 4
 DT Series
 B450
B450 Bose QC 35, 35ii, 25, 15, & More
 Bose 700
 Bose QC 45 & QC 2023
 Bose QC Ultra Gen 1 & Gen 2
 Void Pro
 HS 50, 60, and 70
 HS 80
HS 80 Virtuoso RGB Wireless
 Virtuoso Pro
 Virtuoso Max
 H6 Pro
 Cloud Models
 Evolve2 65
 G Pro X Series
 G733
G733 Blackshark V2 Pro (Pre 2023)
 Blackshark V2 Pro 2023
 Kraken V3 Pro
 Blackshark V3 Pro
 600, 800, & 900 Series
 PC38X & More
 HD Series
 Momentum 4, 5 & HDB 630
 Crusher
 Crusher ANC 2
 Hesh 2
 PS5 Pulse Elite
 PS5 Pulse 3D
 MDR 7506, CD900ST, & V6
 MDR-RF Models
 WH1000XM3
 WH1000XM4
 WH1000XM5
 WH1000XM6
 WH900N
 Inzone H9
 Old Arctis
 Arctis Nova Pro Wireless, Nova Elite & Nova Pro Omni
 Arctis Nova Line (PRO Wired, 1, 3, 7 & More)
 Stealth Pro
 Stealth 700 Gen 2
 Stealth 700 Gen 3
 Old Stealth Models
 Crossfade Series
 XBOX Wireless
 Airpods Max
 Beats Studio Pro
 Beats Solo
 Beats Studio
 Bose QC15
 Bose QC Ultra Gen 1 & Gen 2
 Momentum 4 & 5
 Ace
Ace WH1000XM3
 WH1000XM4
 WH1000XM5
 WH1000XM6
 Airpods Max
 A40
A40 A50
A50 Maxwell
 ATH M Series
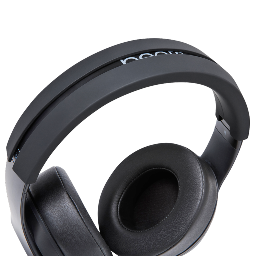 Beats Studio
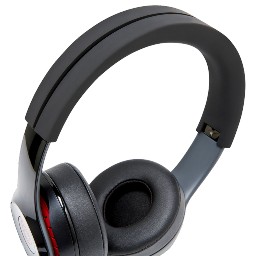 Beats Solo
 Quietcomfort
 Corsair Virtuoso RGB Wireless
 HyperX Cloud
 WH1000XM3
 Arctis Nova Models
 Arctis Nova Models
 Airpods 1, 2, 3, & Pro 1 & 2
 AirPods Pro 3
 Airpods 4
 Airpods Pro & Pro 2
 Powerbeats Pro 2
 Galaxy Buds 3 & 4 Pro
 Airpods Max
 WH1000XM5
 WH1000XM6
 MousepadZ
FAQ About Beats STUDIO & SOLO Earpad Replacement Process
In the last couple of weeks , we have gathered the most frequent questions we receive from our customers about the installation method of our beats replacement ear pads.
We hope that this post helps out , if there are any questions unanswered , feel free to contact us HERE
Question number 1
- I removed the cushion , but it looks nothing like what you show in the video , what should I do?
If your ear cup looks like the photo underneath after removing the cushion , it means you have only removed the foam part of the cushion.
The plastic base of the ear pad still remains attached to the headphones in this example , and it is EXTREMELY important to remove it before applying the new ear pad.
If you install the ear pad on top of the old plastic base , it will cause a sound distortion and the ear pad will eventually fall off.
How do I remove the plastic base?
Gently shove a butterknife in between that piece of plastic and the headphone ear cup , do that from several angles until the plastic is easily removeable.

Question number 2
- Which cushion is for the right side ?
The right side cushion will be easily recognizeable by its usb port cutout , on all of the beats STUDIO wired / wireless and SOLO versions there is a usb port on the right side ear cup , this cushion was made to accommodate for it.

Question number 3
- The right side ear pad fit perfectly , but the left side seems to have a gap , why is that?
Most likely , you have installed the left side ear pad upside down.
You can still remove the existing cushion gently , while trying to keep most of the adhesive on it , flip it and reinstall it.
To recognize the bottom of the ear pad , look for the seam that connects the leather, as shown in the photo underneath.